How to adjust mountain bike suspension – easy ways to get a totally sorted setup
Tune your fork and shock to get the best possible performance out of your mountain bike

Suspension is one of the more complex parts of a mountain bike. Both the fork and the rear shock have multiple adjustments that can make things confusing and tricky to figure out. However, even if you have the best mountain bike forks proper suspension setup is essential. There’s a reason why pro riders spend hours testing and tuning their suspension for each individual race venue. Well-tuned suspension is faster and will make your ride more enjoyable.
There are a few reasons why tuning your suspension is important – namely comfort, performance, and traction – these all are interconnected as well. Downhill racers will run stiffer suspension than regular riders because of the high speeds and bigger impacts they experience, but normal riders would probably find stiffer suspension uncomfortable. You can tune your suspension for the type of riding you do, and you’ll be more efficient and faster on the trails. One of the more important functions of suspension is traction. The suspension allows the wheels to track the ground rather than getting bounced into the air, which helps the tires find traction in the dirt.
This is intended as a general starter guide to adjusting your suspension. Each manufacturer is slightly different, so you can look for your brand’s own guidance for more specific advice. There is generally no right or wrong way to set up suspension. Tons of variables can apply including terrain, rider weight, riding style, and what feels good to you.
All models may not have all of the possible adjustments on them. Budget mountain bike forks and shocks will have limited ability to be fine-tuned by the rider, while more expensive models will have more adjustment knobs and dials.
Sag
Sag refers to how far your shock and fork travel when you are sitting on your bike. It’s adjusted by increasing or decreasing the air pressure in the air spring. This is the first thing you should adjust when setting up suspension.
A higher amount of sag (measured in percentages) will mean more suppleness, while less sag will be stiffer and harsher feeling. As sag is measured in percentages, longer travel bikes usually use more sag compared to shorter travel bikes.
To start, make sure that all of the adjuster knobs are in the fully open position. If you’re not sure, look up your brand’s user manual to figure out which direction to turn the knobs. Then, pump up the shock and/or fork with a shock pump. Manufacturers will have a suggested air pressure based on a rider’s weight which can often be found on the fork leg or manufacturer's website.
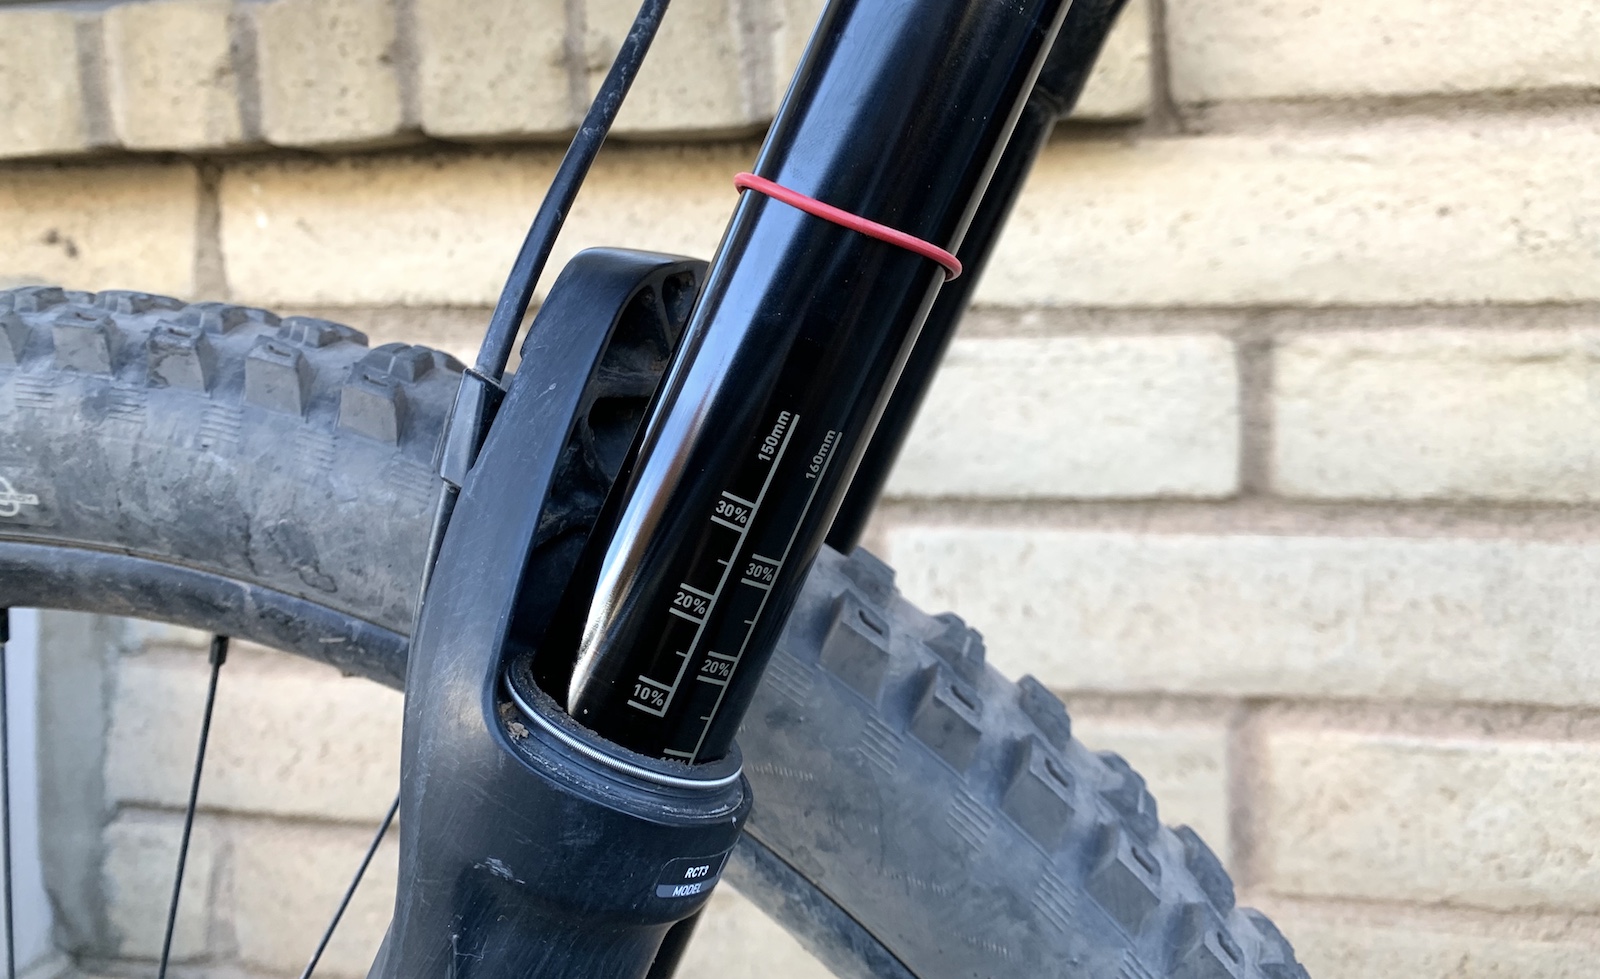
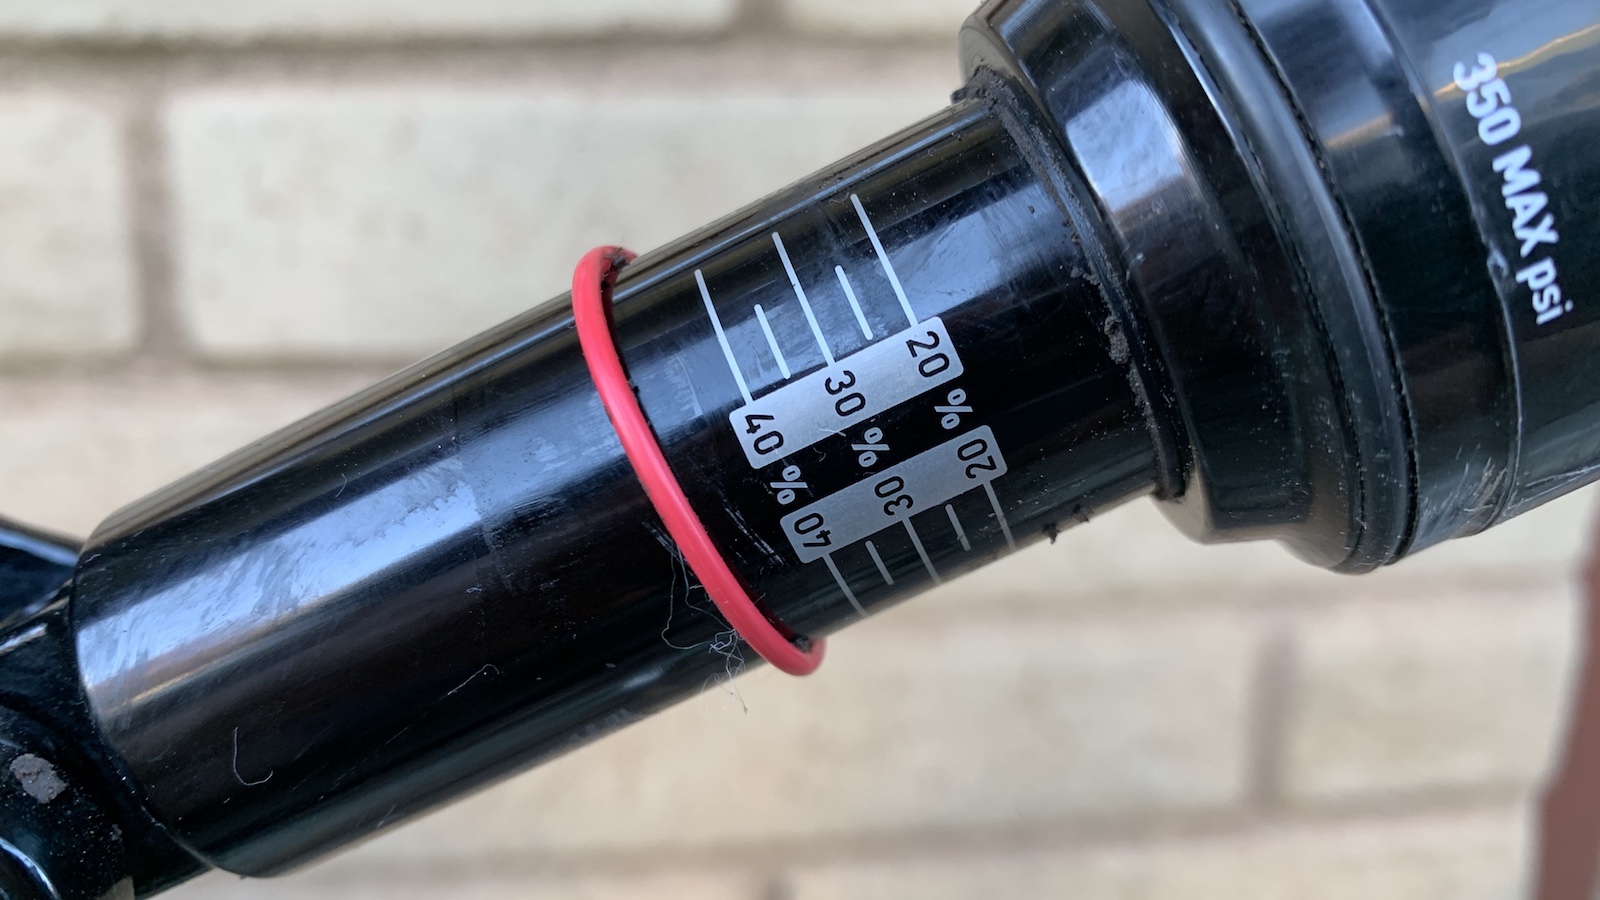
Next, sit on your bike with all of your regular riding gear on – include a full riding pack and bladder if that's what you ride with. Observe how far the fork and shock move down their travel. This can be done on most models with the rubber O-ring that’s pre-installed on the shock and one of the fork stanchions (aka legs).
Some models will also have measuring lines with percentages printed on the stanchion, but you can also measure by hand.
For example, if the suspension manufacturer says you need 20 percent sag, you want the O-ring to line up with the 20 percent measuring line. If it goes past the line, you need more air pressure, and if it doesn’t reach the line, you need less.
To measure sag by hand, simply take a measuring tape and measure how far the O-ring has traveled. Use that number along with the total travel of your fork or shock to calculate the percentage, then adjust the air pressure with your shock pump as required.
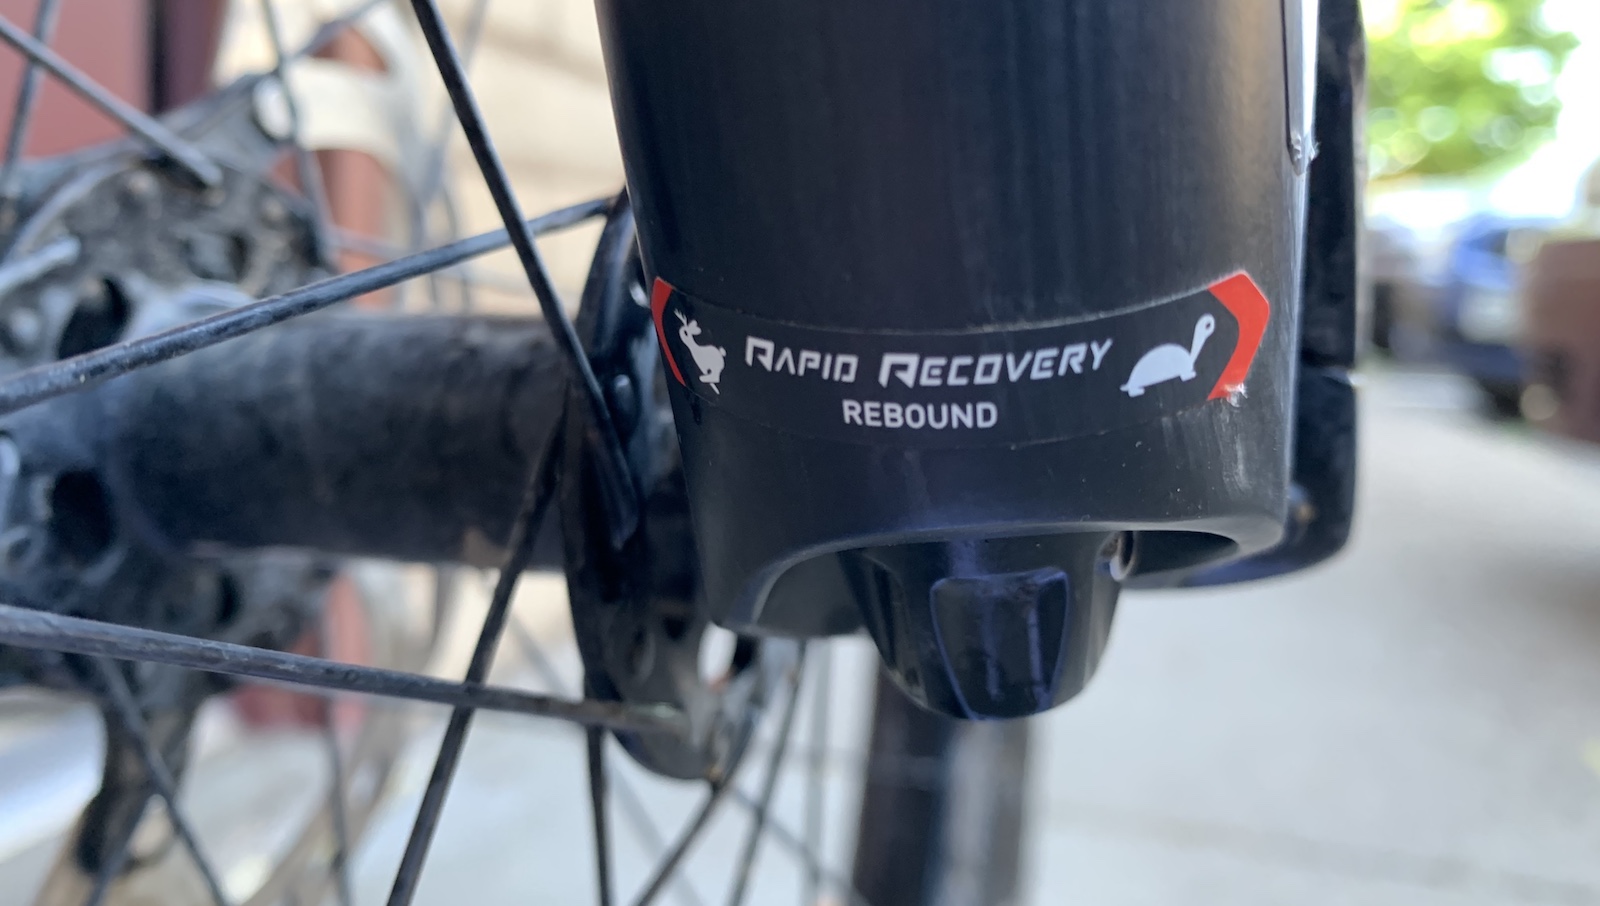
Rebound
Once you’ve set your sag, you can move to rebound. Rebound is the speed at which your fork or shock returns from the bottom of its travel. This adjustment helps with traction and control. The rebound adjustment knob will be found on the bottom of the fork leg and near the top of the shock.
Rebound that's too fast will cause the bike to bounce off of rocks and objects, which can send you flying over the bars or feel out of control. Rebound that’s too slow will not allow the suspension to regain its full travel before the next impact on the trail, which will lead to a bogged down or harsh feeling.
High-end forks and shocks will feature high speed as well as low-speed rebound. High-speed rebound only affects the suspension's performance as it rebounds from full compression before the low-speed circuit takes over. Most products only feature a low-speed rebound adjuster, with high-speed being factory set, since that’s what’s used the most when riding.
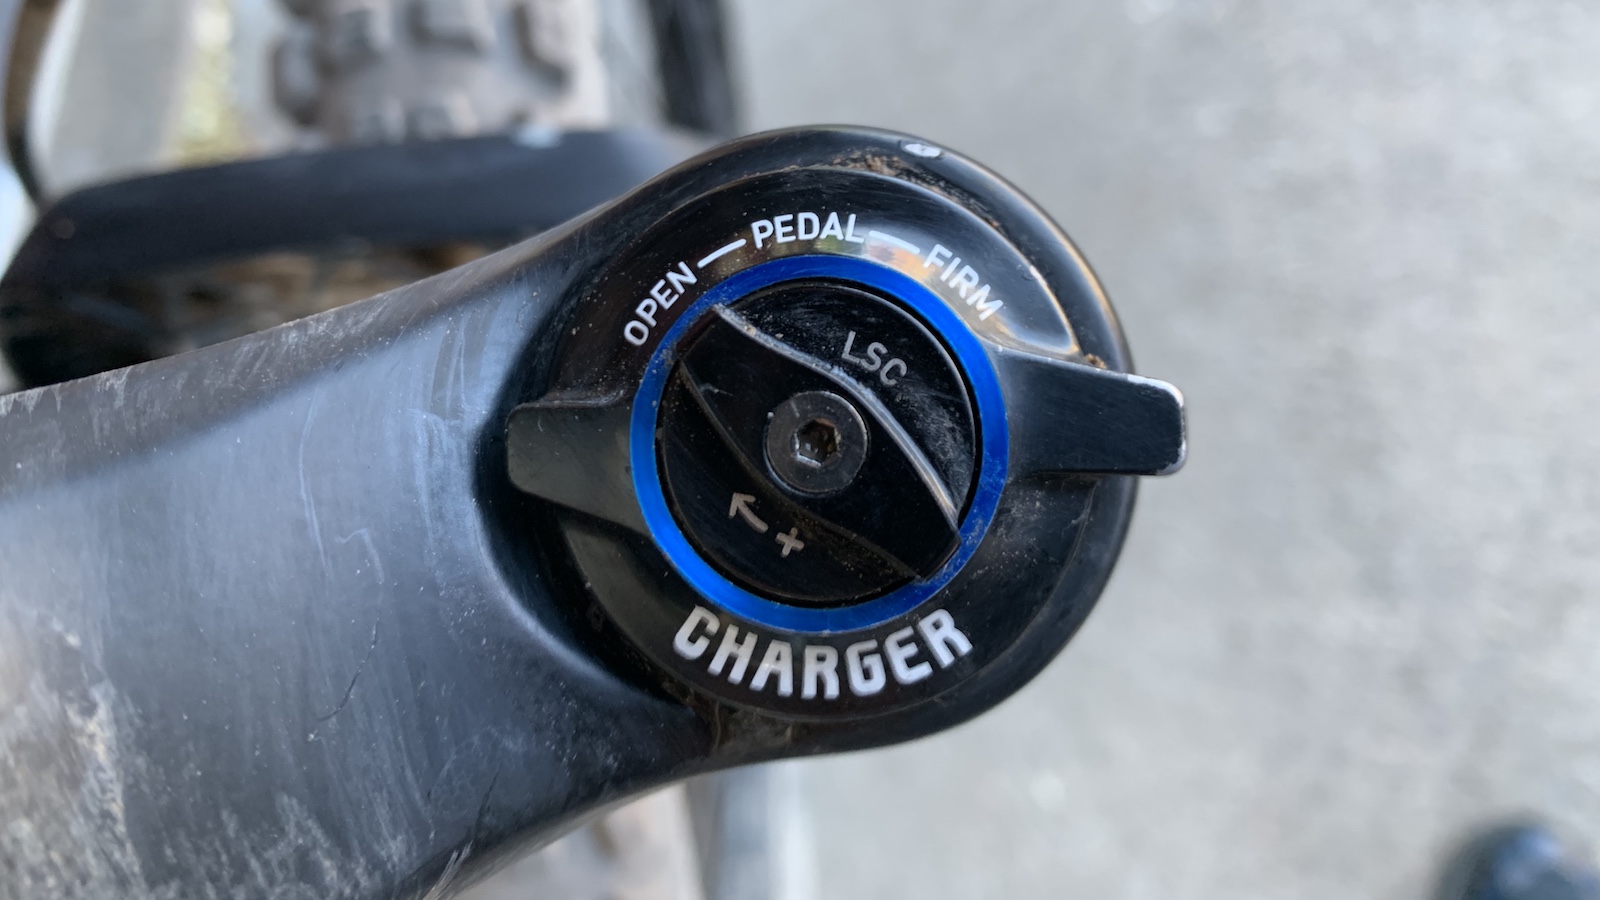
Compression
Low-speed compression refers to how your suspension moves during “low speed” impacts. This is not how fast you’re riding on the trail but rather how fast the shaft is traveling during an impact. So low-speed compression is how your suspension moves when you stand up to pedal or experience g-forces in a berm.
Increased low-speed compression will cause the suspension to ride higher up in its travel, which will feel more firm or stiff over bumpy terrain. Decreased low-speed compression allows the suspension to freely move through its travel, which will feel more soft and supple in bumpy terrain.
If there is only one compression adjustment knob on your suspension, it is probably low-speed compression.
High-speed compression controls how fast your suspension compresses when riding over big bumps, square edge rocks, or drops.
Increased high-speed compression will feel firm over bumpy terrain, while decreased high-speed compression will feel softer and more supple.
The adjustments discussed here are nearly the same between air-sprung suspension and coil-sprung suspension. Coil shocks, which are becoming more popular on enduro bikes, have an additional adjustment called pre-load.
Preload refers to how much tension is on the spring of the shock, and is how coil shock users can adjust their sag.
As can be seen, suspension can be confusing, and unless you have intense knowledge of physics, it may take some experimentation to figure out how all of the adjustments work in tandem out on the trail.
One method to find your ideal suspension settings is to find a section of trail that’s representative of the terrain that you ride most often. It should be short enough that you can do multiple laps. Ride a lap, and then make some adjustments. Observe how the suspension feels now.
Do you feel like you have more or less traction? Does the suspension feel stiff or soft? Repeat this until you feel like the suspension feels good to you. And remember, every terrain type and trail park is likely to require a different suspension tune.
Ryan Simonovich has been riding and racing for nearly a decade. He got his start as a cross-country mountain bike racer in California, where he cultivated his love for riding all types of bikes. Ryan eventually gravitated toward enduro and downhill racing but has also been found in the occasional road and cyclo-cross events. Today, he regularly rides the trails of Durango, Colorado, and is aiming to make a career out of chronicling the sport of cycling.
Rides: Santa Cruz Hightower, Specialized Tarmac SL4
