
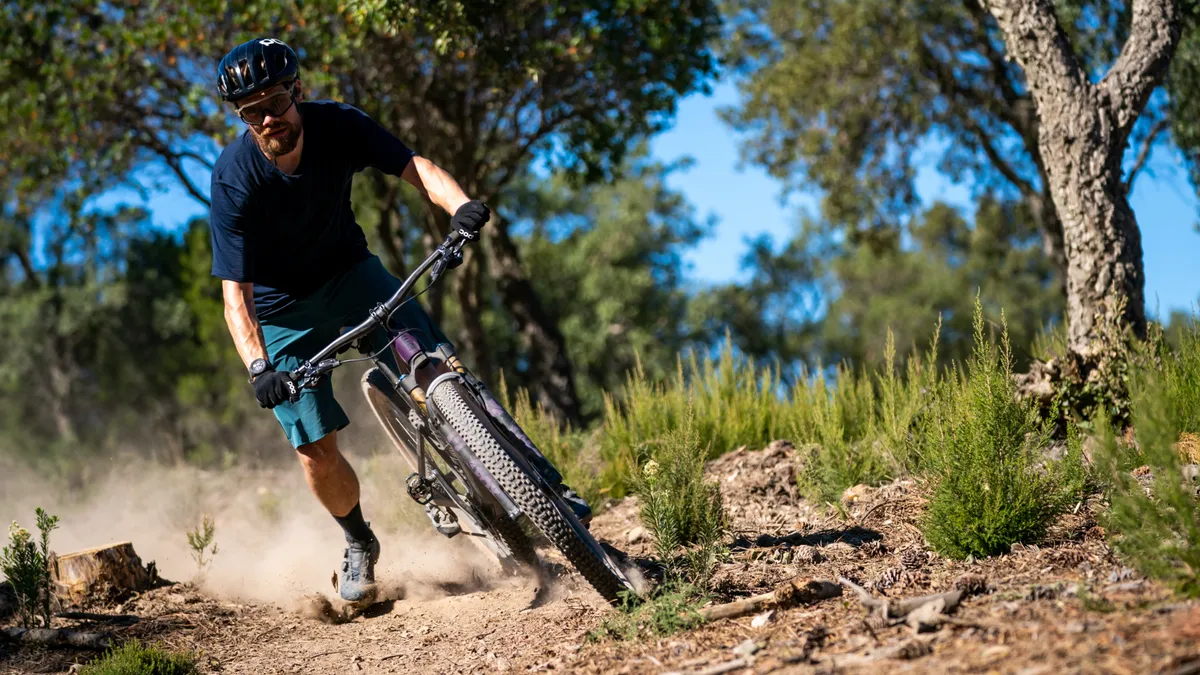
Modern bikes come loaded with rider aids and tech that allow us to ride faster than ever, however, without a doubt one of the most important components of a bike are the tires. Even if you have the fanciest drivetrains, suppliest suspension, and the most powerful brakes, tires are your sole connection to the ground and if they aren’t up to the job or setup correctly, you'll be struggling on the trails.
If you're looking to upgrade your bike, opting for a set of the best MTB tires is usually the best place to start as they will offer the best bang for your buck MTB upgrade and can transform how a bike rides.
Choosing the right mountain bike tires is a bit more complicated than just picking the grippiest-looking set off the shelf though. Most tires are designed for specific types of riding or trail conditions, so it is important to do a little research to choose correctly. Luckily for you, I have broken down everything you need to know about tires and tire choice so you can easily choose the right tires for your riding.

Choosing the right size tire
Before we delve too deep into tire tech, you need to choose a tire that is the right size for your bike. There are a few factors that should be considered when choosing a tire so you know it will fit.
Firstly mountain bike wheel size, most modern mountain bikes will have either 29in or 27.5in (sometimes referred to as 650b) diameter wheels. It may also have a mixture of both (29 front and 27.5in rear) if it has a mullet aka MX setup. Older mountain bikes and dirt jump bikes will most likely use 26in wheels and some smaller kid's bikes will have 24in wheels.
While inches are the most common unit of measurement for MTB wheels and tires, they may also refer to the ISO size, which is the inner bead diameter of the tire, measured in millimeters. For reference, 29in tires are ISO size 622, 27.5in are ISO size 584, and 26in are ISO size 559. This sizing will be correct for the majority of all MTBs, however in the unlikely event that you’re reading this and have a very old and obscure bike that doesn't use the above sizing, I suggest you head over to Sheldon Brown's website for all the niche information on tire sizing you will ever need.
Next, you will need to consider frame clearance as this will determine the maximum possible tire width. Almost all frame and fork manufacturers will state the maximum tire clearance of their product, alternatively, you can simply measure the gap between the fork legs, chainstays, and seatstays yourself. If you are measuring clearance yourself remember to factor in mud clearance, the International Organization of Standards (ISO 4210) quotes a minimum of 6mm between the shoulder of the tire and frame.
Unfortunately, even with these measurements, tire clearance can be a bit of a guessing game. Not only are there discrepancies between different brands' measurements (some tires are narrower or wider than stated), but the rim you mount the tire on can have a massive effect on the tire shape. Essentially, a narrow rim will give the tire a taller light bulb shape while a wider rim gives a tire a rounder wider profile.

A rim’s effect on the shape of the tire will affect the performance so it is worth checking that your rim's internal width is suited the to size of the tire you are planning on using. We are seeing 30mm inner rim diameters becoming the standard and it's generally accepted that any tire between 2.35in and 2.8in will work well with this inner rim width. Cross-country bikes may have narrower rims which will work better with narrower tires (2.35in and below) and ‘plus’ (2.8 to 3.0in) tires will need the support of a wider rim (35mm to 40mm). Rim width and corresponding tire size aren’t an exact science, however, staying within recommended sizing will ensure your tire performs properly and safely.
If in doubt, it's worth checking with your wheel or tire manufacturer to see if they have recommended guidelines for their products. Here are some quick links for the main tire brands and their tire/rim width charts:

Understanding MTB tire construction and characteristics
To understand how a tire will perform we need to dissect the tire and talk about its construction as this affects how a tire will ride and perform.
The tread has the most obvious effect on how a tire’s performance. There are a wide variety of different tread patterns but they all essentially aim to do the same thing, grip the ground when cornering, pedaling, and braking. Brands can use different tread patterns, shapes, and spacing to change how the tire interacts with the trail surface. Manipulating tread shape can play a huge role in how a tire performs – square edges offer more traction while adding forward-facing chamfers increases rolling speed. The tread can also be sipped – these are the cuts or grooves in the tread block allowing more deformation to the blocks and another edge for grip. Horizontal sipping will affect braking and acceleration grip, while vertical sipping improves cornering performance. Tread patterns are often direction-specific and can also be front and rear-specific (more on that later).
The tire tread is made from a rubber compound which can also be used to change the ride characteristics and durability of a tire. Softer compounds are grippier and rebound slower to reduce vibrations, but wear faster and have more rolling resistance. Harder compounds last longer and roll faster but don’t have as much grip. Many brands will use a combination of compounds (usually referred to as dual or triple), layering softer rubber over hard to get better performance.
The casing or carcass of the tire is the base structure of the tire to which the tread is attached. The casing will be made up of single or multiple layers (sometimes referred to as plys) and may feature cut and abrasion-resistant inserts on the side walls and under the tread to protect against punctures. The casing is measured in TPI (Threads Per Inch). Casings with lower TPI numbers will be more durable but heavier than higher TPI casings. High TPI casings are lighter and more supple, allowing them to conform to the terrain, but are more fragile. Dual-ply casings will use two layers to give a better balance between strength, suppleness, and vibration dampening.
A specific tire may come in different widths as a tire width can have a dramatic effect on how it performs. Increasing the width of a tire also increases the tire footprint, overall diameter, and air volume. That means narrower tires will roll faster on smooth terrain while larger tires with bigger air volume will have more grip and float over rough terrain better.
None of these elements work in isolation and will have effects on other characteristics of the tire. So while all these different parts of a tire's construction are important, they must be considered as a system.

Tailoring tires to your riding and the conditions
Tires are often MTB discipline or terrain-specific and all the big manufacturers have a range of tires to cater to every type of mountain biking, all you need to do is pick the right one. Well sort of, there is a lot of cross over and often manufacturers will have multiple different versions and price points of the same tire, all with different characteristics. Let's break it down.
Unfortunately, it’s a little more complicated than just picking the best MTB as tires fall into an “iron triangle”, aka a three-constraints scenario. These are grip, speed, and durability. Fast and grippy tires will have thinner sidewalls and are more prone to punctures. Start beefing up those sidewalls though and the tires will become heavier and feel numb and disconnected in corners. The extra rubber and protection to make a grippy, durable tire adds a lot of weight and rolling resistance to a tire. Choosing the right tire is about finding a compromise.

From discipline to discipline, tires will have different tread patterns, compounds, and casing construction. Cross-country tires will have a shallower tread designed to roll quickly and less puncture protection to keep weight to a minimum. Enduro, downhill, and e-MTB tires prioritize grip and sidewall protection. Using large tread blocks and multilayered and reinforced sidewalls to protect against sharp rocks and race-ending punctures while giving more support on high-speed descents. Trail tires sit in between the two, although a lot of trail tires are becoming more heavy-duty as bikes become more capable and progressive.
The trail conditions you ride in will also play a major role in which tire will perform the best. These are often broken down into the following tire categories by manufacturers to make it easier:
- Mixed terrain - This usually indicates the do-everything tire in the range, capable of performing well in a wide range of terrain and weather conditions.
- Loose - Rocky, gravelly, or sandy surfaces can shift around under the tire and demands supportive, well-spaced knobs to search for solid ground under the loose stuff.
- Hardpack - Hard compacted dirt or slick rock in the dry. A low-profile tread or semi-slick with a soft compound is a good option as it increases the tire contact with the surface and allows the rubber to do its work. Minimal tread severely limits loose surfaces and wet weather traction.
- Rocky - Rocky terrain has some crossover with loose and hardpack but usually indicates that a tire has increased puncture protection against jagged edges.
- Mud - Deep mud, soft and very loose trail conditions. Mud tires (or spikes) are usually reserved as race-only due to their very specific use case. They feature wide-spaced tall lugs and a narrow tire width to dig into the soft surface and avoid getting clogged up. If the tread can't dig into the trail surface they struggle for grip making mud tires lethal on rock slabs and hardpack sections. Back in the day, World Cup downhill mechanics used to cut the blocks on mud tires shorter, since then some brands have released cut-spike-specific tires that share the same wide spacing but with a more versatile tread block height.
The gradient of a trail will also play a role in choosing a tread pattern. Steeper trails demand more braking performance, so speccing a tire with a broad soft tread pattern will help slow you down faster. On flatter trails, braking performance isn’t as demanding, however, without gravity pushing you down the hill you will want to prioritize rolling speed.
As we previously mentioned, tread patterns can be front and rear specific. The front and rear tires perform very different tasks, with the front wheel handling cornering and the rear braking and acceleration. With that in mind, it makes sense to tailor the tread pattern accordingly, particularly with gravity-orientated tires where grip is of the most importance. That doesn’t mean they can’t be run as a matching pair, Maxxis’ Minion DHF and Minion DHR II are the perfect examples of this. Using two DHFs or DHR IIs is a popular setup, with the front and rear DHF proving to be a quick rolling cornering combo while two DHR IIs are almost unbeatable on steep fast terrain.
Mixing and matching different models of tires is also a great way to tailor performance. Running a soft grippy tire up front and a harder compound or lower profile tire at the rear is a go-to for most rugged XC, downcountry, and trail riders as it helps enhance cornering grip without sacrificing too much rolling speed. On the other hand, e-MTBs and downhill bikes may run a thicker casing rear tire with a thinner front enduro tire to help save a little weight.

How much should you spend on tires?
With tires, you can absolutely buy speed. Better materials, more advanced rubber compounds, and improved manufacturing processes all add up to faster, grippier, and lighter tires. That's not to say you should go out and spend all your money on tires, as ultra-grippy tires may be overkill for your type of riding and will usually wear out a lot faster as well.
As a general rule, for dry weather XC and trail riding an endurance rubber or dual compound tire will have adequate grip and roll quickly. For wet weather or a more gravity focussed softer rubber and triple compounds are the way to go. For full enduro and downhill, look at getting the stickiest rubber and most robust sidewalls.
For a good quality MTB tire, prices range between $60 / £40 and $90 / £70.
Want to know what our favorite XC, trail, and enduro tires are? Head over to our best MTB tire guide to find out.

